Menu

Call This Monday to Get $25 OFF

Guide & Tips for Drywall Crack Repair
30/Jan/2025

We’ve all been there: You walk into your living room in a good when you notice a tiny crack snaking its way across the drywall. It's like a little blemish that suddenly breaks the spell of your otherwise perfect space.
While drywall is a great cost-effective option for finishing your walls, those cracks have a way of making even the most well-kept rooms look a little neglected. But don’t worry; drywall repair isn’t as daunting as it might seem. With the right tools and some patience, you can even patch up those cracks yourself.
In this brief article brought to you by Mr. Handyman, we walk through what it takes to repair drywall cracks in your home. If you’d rather have a trained and uniformed handyman take care of it, then call Mr. Handyman to get in touch.

Guide & Tips for Drywall Crack Repair

Assessing the Crack: Is It a Small Job or a Bigger Problem?

Before you grab your spackle and get started, we have to figure out how big of a repair job you’re dealing with. In many cases, those hairline fractures are no big deal. They might just be caused by the house settling or a slight shift in temperature and humidity. These types of cracks are typically surface-level and won’t require much effort to fix.
But if you’re dealing with a wider crack – especially one that runs across the ceiling or the length of a wall – then you may want to dig a little deeper. A wider crack could indicate structural movement or water damage, and it might be worth calling in a professional to assess the situation before you proceed.

Gather Your Materials

You don’t need a ton of fancy tools to repair a drywall crack—just the basics. Here’s what you’ll need:

  • Joint compound
  • Drywall tape
  • Putty knife
  • Sanding block or sponge
  • Primer and paint

These supplies are all readily available at your local hardware store or home improvement center like Lowe’s or Home Depot.

Steps to Repair Drywall Cracks

With your materials in hand, we can get started on the repair:

Our Services

Mailbox Repair & Installation

Rust, a broken door, loose hinges, or a leaning post can make your mailbox unreliable. Since it sits…

Read More

TV Mounting

A new TV is always fun until you need to figure out where it belongs. Leaving it on…

Read More

Step & Stair Repair

Daily use takes a toll on steps and stairs. The creaks, wobbles, or cracks that show up might…

Read More

Railing Repair and Installation

For families with kids, aging parents, or frequent guests, railings keep activities safe. Mr. Handyman works with homeowners…

Read More

Caulking

Big renovations get attention, but the truth is, many of the problems inside a home start small. Gaps…

Read More

Painting Service

Color has a powerful effect on how a space feels. A fresh coat of paint can brighten a…

Read More

Trim Repair

Walk up to any house and your eye catches the trim before almost anything else. Around the garage,…

Read More

Storm Door Installation

Adding a storm door gives your entry a finished look and protects it from wind, rain, and extreme…

Read More
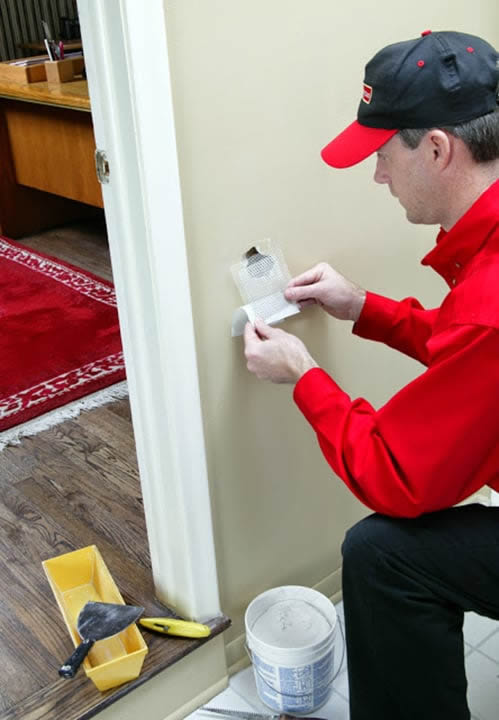
  • Start by prepping the area around the crack. Clean the surface around the crack and use a utility knife to gently widen the crack if it’s very narrow (this allows the compound to fill the crack more effectively).
  • Next, use your putty knife to apply a thin layer of joint compound over the crack. Try to keep the layer thin and even to avoid excess sanding later. Once the crack is covered, feather the edges of the compound so that it blends with the surrounding wall.
  • Now, let it dry. Depending on the thickness of the compound and the humidity level, it could take anywhere from a few hours to overnight to fully dry. 
  • Once the final layer of the compound is dry, it’s time to sand. Use a sanding block or a sanding sponge to smooth the area until it’s flush with the wall. Big cracks may require multiple layers. After each layer dries, lightly sand it with a fine-grit sanding block to smooth it out.
  • Finally, it’s time to make the repair disappear! Apply a coat of primer to the patched area. After the primer dries, paint over the repaired crack with a color that matches the rest of your wall. You may need a couple of coats for best blending.

When to Call in the Pros

While repairing small drywall cracks is a manageable DIY project, it’s not always the best option for everyone. If you’re not feeling confident in your skills or if the crack is part of a bigger issue (like water damage or structural shifting), it might be worth hiring a professional handyman service.
Mr. Handyman is a reputable name in the business, and our uniformed handyman are here to help with any type of crack drywall repair in Newtown, PA, and all nearby areas. We provide upfront price estimates so you can be sure you’re getting affordable service. Call or message us today to get in touch!

Social Media :
Latest Updates

Recent Posts

How Stair Repairs Improve Home Safety and Appearance 20 May, 2026
20 May, 2026

How Stair Repairs Improve Home Safety and Appearance

Stairs get kicked and take a beating every day. Family members rush up and down them, guests walk across them, and…

Read More
Custom Screen Installation vs Standard Screens 14 May, 2026
14 May, 2026

Custom Screen Installation vs Standard Screens

Bent frames, sagging mesh, and screens that never quite fit the window are frustrating problems homeowners deal with all the time.…

Read More
How Experts Hang Pictures Perfectly Straight Every Time 08 May, 2026
08 May, 2026

How Experts Hang Pictures Perfectly Straight Every Time

It’s like straight out of a sitcom. You eyeball the spot, hammer in a nail, hang the frame, step back… and…

Read More
Small Repairs That Can Extend Your Mailbox Life 30 Apr, 2026
30 Apr, 2026

Small Repairs That Can Extend Your Mailbox Life

Your mailbox doesn't ask for much. It stands at the end of your driveway, rain or shine, and does its job…

Read More